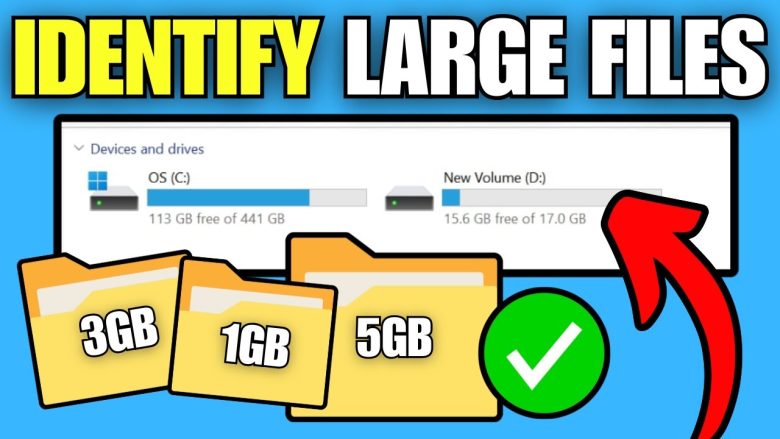
You turn on your Windows 11 computer to download a critical system update or install a new creative application, and you are greeted by an alarming red progress bar across your C: drive. Your solid-state drive is sitting at 96% capacity. Programs hesitate when launching, Windows Update throws cryptic storage-exhaustion error codes, and your system feels sluggish.
Frustrated, you open your Downloads folder, delete a few forgotten movie clips, and empty the Recycle Bin. You check the drive again, only to discover you reclaimed a measly four gigabytes out of hundreds that seem to have vanished into thin air.
Where is all your storage actually going?
On a modern operating system like Windows 11, storage bloat rarely comes from a single obvious file sitting out in the open on your desktop. Instead, disk space gets eaten alive by hidden culprits: forgotten virtual machine disks, multi-gigabyte shader caches, accumulated system restore points, unpurged Windows installation backups (Windows.old), runaway application log files, and oversized game DLCs buried six layers deep inside hidden system folders.
Trying to track down these space hogs by manually clicking through folders in File Explorer is like searching for a needle in a digital haystack. You need a structured, reliable method to scan your drives, identify the genuine monsters, and purge them without accidentally bricking your operating system.
In this comprehensive, step-by-step guide, you will learn how to locate large files on Windows 11 using built-in settings, advanced search syntax, lightning-fast third-party visualizers, and power-user terminal commands. Most importantly, you will learn how to safely distinguish between disposable clutter and essential system files.
Understanding Where Windows 11 Hides Your Drive Space
Before diving into cleanup tools, it is crucial to understand how disk storage is distributed across a Windows 11 PC. If you do not know what types of files consume space, you risk either wasting time cleaning inconsequential files or deleting critical files that break your software.
Disk usage generally falls into four distinct categories:
- User Personal Files: High-resolution video recordings, raw photography files, compressed zip archives, virtual disc images (.ISO), and personal projects. These are straightforward to identify and safe to move or delete.
- Applications and Modern Game Assets: High-end modern PC games regularly exceed 100 to 150 GB each. Furthermore, design and engineering suites (like Adobe Creative Cloud, Blender, or AutoCAD) store massive local scratch disks and caches that persist indefinitely.
- Application Support and Cached Data: Located in the hidden
AppDataandProgramDatadirectories. Communication apps, web browsers, and media players constantly write cache data, temporary update packages, and crash dumps here without automated purging. - Windows System & OS Infrastructure: System components such as the hibernation file (
hiberfil.sys), virtual memory paging files (pagefile.sys), Volume Shadow Copies (restore points), and the WinSxS component store. These cannot be managed by simply hitting the Delete key.
Understanding this breakdown ensures that when you run your diagnostics, you immediately know whether you are looking at user data, an unruly software cache, or a Windows operating system core requirement.
Method 1: Harnessing Windows 11 Native Storage Sense and Cleanup Recommendations
Windows 11 features a significantly improved storage management suite compared to earlier iterations of the operating system. Before downloading any third-party utility, you should begin with the built-in diagnostic tools that Microsoft provides.
Accessing the Storage Overview
To open the native storage console:
- Press
Win + Ion your keyboard to open the Settings menu. - Ensure System is selected in the left navigation sidebar, then click on Storage in the main panel.
- Give Windows a few seconds to scan your primary drive (
C:).
The console will present a categorized visual breakdown of your storage consumption, divided into Installed apps, Temporary files, and other categories such as Documents, Pictures, or Other.
If you have secondary hard drives or external storage connected, scroll to the bottom of this page and click Advanced storage settings > Storage used on other drives to view similar breakdowns across your entire hardware configuration.
Using Cleanup Recommendations
Directly beneath the storage usage bar, Windows 11 provides a dedicated feature titled Cleanup recommendations. Clicking into this menu reveals four curated sections designed to free up space with minimal effort:
- Temporary files: Highlights previous Windows installation copies (
Windows.old), delivery optimization files, memory dump files from past system crashes, and setup logs. Clearing previous Windows installations alone can frequently recover anywhere from 15 GB to 35 GB following a major OS feature update. - Large or unused files: Automatically surfaces personal files, video captures, and archives that you have not opened or accessed in several months, sorted by file size.
- Files synced to the cloud: Identifies local files synced to OneDrive that can safely be converted to “cloud-only” placeholders, keeping them available on demand without consuming local drive sectors.
- Unused apps: Catalogs software installations and desktop games you have not launched recently, displaying their total footprint on disk alongside an instant Uninstall button.
Automating Routine Purges with Storage Sense
While manual cleanups solve immediate emergencies, you can prevent future storage warnings by configuring Storage Sense. Toggle Storage Sense to On, then click into its settings:
- Set it to run automatically when free disk space gets low or on a fixed recurring schedule (e.g., monthly).
- Configure it to automatically delete files that have resided in your Recycle Bin or Downloads folder for longer than 30 or 60 days.
- Enable automatic cloud hydration for OneDrive, ensuring files not opened in over 30 days revert to online storage.
Method 2: Finding Monster Files with File Explorer Advanced Search Syntax
Windows File Explorer possesses robust search indexing capabilities, but the graphical interface hides its most powerful operators. If you know the precise search queries to type into the top-right search box, you can force File Explorer to filter your entire drive for files exceeding specific size thresholds.
Step-by-Step Search Protocol
- Press
Win + Eto open File Explorer. - Click on This PC in the left sidebar to search across all mounted storage drives, or double-click a specific drive (such as
C:\) to confine your search. - Click inside the search box in the upper-right corner of the window.
- Type one of the following specialized size filters and press
Enter:
size:>1GB
This operator tells Windows to return every single file on the drive that occupies more than one gigabyte of space. You can calibrate this figure to any threshold you desire:
size:>5GB— Isolates ultra-large files like game installers and disk images.size:>500MB— Broadens the net to capture bulky PDFs, videos, and zip files.
Windows also supports built-in size presets:
size:gigantic— Matches any file larger than 4 GB.size:huge— Matches files between 1 GB and 4 GB.
Refining Searches by File Category and Extension
If your generic size search yields thousands of mixed results, combine size parameters with specific file kinds or extensions:
- Search exclusively for massive video files:
kind:video size:>1GB - Search for heavy disk images and virtual drives:
(ext:.iso OR ext:.vhd OR ext:.vhdx) size:>1GB - Search for forgotten archives and installers:
(ext:.zip OR ext:.rar OR ext:.7z OR ext:.exe OR ext:.msi) size:>500MB
Sorting and Revealing Hidden Locations
Once File Explorer finishes populating the search results:
- Click the Sort dropdown in the top toolbar, select Size, and choose Descending. The largest files on your machine will rise directly to the top of the list.
- To see where a specific file lives on your system, right-click any item in the search results and choose Open file location. Never delete a large file directly from search results without checking its parent folder first, ensuring you don’t inadvertently delete an active game data container or database file.
- Make sure hidden files are visible by clicking View in the top menu, selecting Show, and checking Hidden items.
Method 3: Visual Disk Mapping with WizTree and TreeSize Free
While File Explorer search works well for finding individual gigantic files, it is notoriously poor at diagnosing nested folder bloat. For instance, if an application created a folder containing 20,000 separate high-resolution image files that collectively take up 40 GB, File Explorer’s size search will completely overlook it because no single file is larger than 2 MB.
To spot both large standalone files and massive directory clusters, professional system administrators rely on visual disk analyzers.
Why MFT Scanning Changes Everything
Traditional tools like the classic, open-source WinDirStat scan drives by reading every directory tree one by one. On a 1 TB or 2 TB solid-state drive with hundreds of thousands of files, this scan can take ten to twenty minutes.
Modern utilities like WizTree bypass standard Windows API directory traversal entirely. On NTFS-formatted drives (which virtually all Windows 11 PCs use), WizTree directly reads the drive’s Master File Table (MFT) directly from disk sectors. As a result, it indexes an entire 1 TB SSD with complete accuracy in approximately two to three seconds.
Top Disk Space Analyzers Compared
| Software Tool | Scanning Speed | License Model | Best Features |
| WizTree | Instant (2–5 seconds via MFT) | Free for personal use; portable version available | Interactive visual Treemap, instant sorting, zero background resource consumption. |
| TreeSize Free | Fast (15–30 seconds) | Free basic tier; installer or portable | Deep context menu integration directly within Windows File Explorer. |
| WinDirStat | Slow (3–10 minutes) | 100% Free & Open Source | Classic visualizer, but lacks modern MFT acceleration. |
How to Diagnose Your Drive with WizTree
- Download the portable zip archive of WizTree from its official vendor website (the portable version requires no installation).
- Right-click the executable (
WizTree64.exe) and select Run as administrator. Running as administrator is mandatory; otherwise, the tool cannot read protected system folders or the raw NTFS Master File Table. - Select your drive (e.g.,
C:) from the top-left dropdown and click Scan. - Within three seconds, your drive will be laid out in two complementary views:
- The Folder Tree (Top Pane): Folders are sorted strictly by total percentage of drive space consumed, expanding down to sub-folders.
- The Visual Treemap (Bottom Pane): Displays every file on your drive as a proportional, color-coded block. The bigger the rectangle, the larger the file on your disk.
- Look at the largest colored blocks in the treemap. Hover your mouse over any block to see its exact name, size, and file path.
- If you spot a massive, unnecessary file (such as an old 30 GB screen recording or an uninstalled game’s leftover folder), right-click it directly within WizTree and select Delete or Open in Explorer.
Method 4: Terminal Diagnostics for Power Users (PowerShell & Command Prompt)
If you prefer operating from the command line, or if you need to diagnose a remote workstation where you cannot install graphical utilities, Windows PowerShell provides immediate diagnostic capabilities.
Extracting the Top 20 Largest Files via PowerShell
You can query your entire file system, sort by raw byte length, and print the exact file paths alongside clean human-readable gigabyte figures in seconds:
- Right-click the Start menu button and select Terminal (Admin) or search for PowerShell and choose Run as administrator.
- Run the following command:
Get-ChildItem -Path C:\ -Recurse -File -ErrorAction SilentlyContinue |
  Sort-Object Length -Descending |
  Select-Object -First 20 FullName, @{Name="Size(GB)";Expression={[math]::round($_.Length / 1GB, 2)}} |
  Format-Table -AutoSize
How this command functions:
-Path C:\ -Recurse -File: Scans all files recursively across drive C:.-ErrorAction SilentlyContinue: Suppresses access-denied warnings for locked system files.Sort-Object Length -Descending: Arranges results with the heaviest files first.Select-Object -First 20: Restricts the output to the top twenty space consumers.[math]::round($_.Length / 1GB, 2): Automatically converts raw byte counts into readable gigabyte metrics.
Checking Volume Shadow Copy Storage Allocation
Windows creates shadow copies for System Restore and previous file versions. If misconfigured, the Volume Shadow Copy service (VSS) can silently swallow up to 15% to 20% of your total drive capacity.
To inspect how much space shadow copies are consuming:
- In your Administrator terminal, execute:
vssadmin list shadowstorage - Inspect the output lines:
- Used Shadow Copy Storage space: How much space is actively occupied right now.
- Maximum Shadow Copy Storage space: The upper boundary Windows is allowed to take.
- If shadow copies are consuming 50+ GB and you need immediate emergency space, you can resize the maximum allocation to a reasonable 10 GB limit by running:
vssadmin resize shadowstorage /for=c: /on=c: /maxsize=10GB
Step-by-Step Triage: High-Yield Targets for Instant Storage Recovery
Once your tools help you identify where the bloat resides, where should you focus your cleanup efforts? Over 80% of preventable storage bloat on Windows 11 accumulates in four specific locations.
Target 1: The Hidden AppData Labyrinth
When you uninstall software or use demanding modern applications, they routinely leave gigabytes of orphaned data inside your hidden user application directory.
- Press
Win + R, type%localappdata%, and hitEnter. - Inspect the folders inside. Common culprits include:
- Adobe Media Cache: Video editing suites hoard uncompressed audio previews and scratch files. You can safely purge the cache inside Adobe Premiere/After Effects settings or delete old cache directories directly.
- Discord, Spotify, and Slack: Electron-based desktop apps build up multi-gigabyte cache repositories over months of use.
- Shader Caches (Nvidia, AMD, DirectX): Located in
AppData\Local\D3DSCacheand graphics driver folders. If you recently updated your GPU or swapped graphics cards, these can accumulate dozens of gigabytes.
Target 2: Previous Windows Versions (Windows.old)
Whenever Windows 11 completes a major annual update (such as 23H2 or 24H2), it preserves a full clone of your previous operating system build in a root folder titled C:\Windows.old. This allows you to roll back the update if hardware issues occur.
- If your computer is running smoothly after the update and you do not intend to revert, this folder represents pure wasted space (frequently 20 GB to 40 GB).
- Do not delete this folder by dragging it to the Recycle Bin. It has strict system permissions that will throw endless file-in-use errors.
- Always delete it properly via Settings > System > Storage > Cleanup recommendations > Previous Windows installations, or by running the legacy Disk Cleanup utility (
cleanmgr.exe) as administrator.
Target 3: Game Client Orphaned Data and Virtual Disks
Modern game distribution platforms (Steam, Epic Games Store, Xbox App, Battle.net) handle enormous file packages:
- Unfinished Downloads: If a 100 GB game download fails or is cancelled halfway, the client often retains the unfinished staging files in directories like
Steam\steamapps\downloading. - Xbox App Game Pass Disks: Games installed through the Microsoft Store or PC Game Pass are stored in virtual encrypted containers within
C:\XboxGamesorWindowsApps. If an uninstall glitch occurs, the virtual disk image can remain locked on your drive.
Target 4: Virtual Machines, WSL, and Docker Volumes
Developers and technical users frequently lose massive amounts of storage to virtual hard disk images (.vhdx files) used by Windows Subsystem for Linux (WSL 2), Hyper-V, and Docker.
- A virtual hard disk dynamically expands as you add files inside your Linux distribution, but it never automatically shrinks when you delete files inside Linux.
- Locate your WSL virtual drive (typically in
AppData\Local\Packages\...or custom install paths) and inspect its size. - You can reclaim unused space inside the VHDX file using the
diskpartutility by selecting the vdisk file and issuing thecompact vdiskcommand.
The Safety Rulebook: What You Should Never Manually Delete
When running visual analyzers or terminal commands, you will inevitably encounter massive files inside system folders that look tempting to erase. Blind deletion inside Windows directories can permanently prevent your computer from booting.
Memorize these core boundaries before touching your Delete key:
+-----------------------------------------------------------------------+
|                    WINDOWS 11 SAFETY CHECKLIST                        |
+-----------------------------------------------------------------------+
|  SAFE TO PURGE                   |  DANGEROUS (DO NOT DELETE DIRECTLY)|
+-----------------------------------------------------------------------+
|  - Old user Downloads & Videos   |  - C:\Windows\System32             |
|  - Windows.old (via settings)    |  - C:\Windows\WinSxS (use DISM)    |
|  - User Temp (%temp%)            |  - pagefile.sys / swapfile.sys     |
|  - Browser and App Caches        |  - hiberfil.sys (use powercfg)     |
|  - Recycle Bin contents          |  - AppData System Registry hives   |
+-----------------------------------------------------------------------+
1. The WinSxS Directory Trap
Inside C:\Windows\WinSxS resides the Windows Component Store. It often measures between 8 GB and 18 GB. Users frequently believe they can delete files inside this directory to reclaim space. Never manually delete files inside WinSxS. Deleting files here corrupts Windows servicing, making it impossible to install future security patches or repair system files. If you need to trim WinSxS safely, open an Administrator terminal and run the official Microsoft component cleanup command:
Dism.exe /online /Cleanup-Image /StartComponentCleanup /ResetBase
2. Hibernation File (hiberfil.sys)
The Windows hibernation file stores the active state of your RAM to disk so your PC can resume instantly. On machines with 32 GB or 64 GB of RAM, hiberfil.sys can consume 20 GB to 40 GB on its own. Do not attempt to delete the file directly. Instead, disable hibernation properly through an Administrator terminal:
powercfg -h off
This command instantly purges hiberfil.sys and updates the Windows boot configuration cleanly. If you later want to re-enable it, simply execute powercfg -h on.
3. Paging and Swap Files (pagefile.sys and swapfile.sys)
These files function as virtual memory when physical RAM becomes exhausted. While you can resize them through Advanced System Settings, deleting or disabling them entirely can trigger system crashes, software instability, and failure of crash dumps during a Blue Screen event.
Proactive Habits for Long-Term Storage Health
Preventing storage emergencies is significantly easier than troubleshooting an overloaded system when you are under a tight deadline. Implement these proactive practices to maintain healthy storage headrooms:
- Redirect Default Download Paths: Change your default download directory in Chrome, Edge, and Firefox to a secondary mechanical hard drive or secondary SSD. This stops your primary OS partition from becoming the dumping ground for multi-gigabyte installer packages.
- Segment Game Libraries: When configuring Steam or Epic Games, create your library on a secondary drive partition (e.g.,
D:\Games). Keeping games off theC:drive ensures that massive updates never compete with critical Windows system services. - Enable CompactOS on Space-Constrained Laptops: If you operate a compact device or budget laptop with a modest 128 GB or 256 GB SSD, Windows includes a native compression algorithm that compresses system binaries with virtually zero impact on performance. Check its status in an Administrator terminal by running
compact /compactos:query. To enable it, runcompact /compactos:alwaysto reclaim roughly 2 GB to 4 GB of operating system overhead. - Perform a Quarterly 5-Minute Audit: Schedule a calendar reminder every three months to fire up a fast MFT scanner like WizTree, run Windows Cleanup Recommendations, and prune old development containers or abandoned game installations.
Frequently Asked Questions (FAQ)
Why is my C: drive completely full when I have almost no personal files saved on it?
Drive space is dominated by hidden system components and software caches. Even if your personal Documents and Desktop folders are empty, accumulated temporary files, Windows Update staging backups (Windows.old), virtual memory files (pagefile.sys), hibernation data (hiberfil.sys), and unpurged caches in your hidden AppData directory can easily consume over 100 GB without your knowledge.
Is WizTree completely safe to use on a Windows 11 system?
Yes. WizTree is a widely trusted, read-only diagnostic utility that is safe for personal and enterprise use. It reads the NTFS Master File Table to calculate file sizes without altering or corrupting your data. However, remember that WizTree grants you the power to delete whatever you select; always exercise caution and avoid deleting files inside the C:\Windows directory.
How do I safely delete the Windows.old folder after an update?
You should never delete Windows.old by right-clicking it and choosing Delete, as Windows file ownership permissions will block the action and leave fragmented directories. Instead, navigate to Settings > System > Storage > Cleanup recommendations, check Previous Windows installation(s), and click Clean up. Windows will automatically handle ownership and safely purge the data.
Will deleting temporary files delete my saved passwords or browser bookmarks?
No. Temporary files consist of cached web assets (images, stylesheets), installer leftovers, error logs, and operating system scratch data. Your bookmarks, browser history, and stored credentials are kept in encrypted database profiles within your browser’s dedicated user data folder and remain completely untouched during standard temporary file cleanups.
Can I move large installed programs or games to another drive without reinstalling them?
Yes. For modern Windows Store apps, go to Settings > Apps > Installed apps, click the three dots next to the application, and select Move if supported. For game platforms like Steam, you can open Steam’s Settings > Storage, create a new library on your secondary drive, select your large games, and click Move to transfer them seamlessly without re-downloading.
Taking Control of Your PC Storage
A full storage drive does not mean you need to immediately spend hundreds of dollars on a hardware upgrade or wipe your computer with a clean Windows reinstallation. Storage bloat is an inevitable byproduct of daily computing, but it is entirely manageable once you know where to look.
By combining the automated intelligence of Windows 11 Storage Sense, the forensic precision of File Explorer search operators, and the lightning-fast visualization of MFT-based disk analyzers, you can pinpoint monster files in seconds. Take five minutes to audit your drive today: purge the hidden caches, clear the obsolete Windows update images, relocate your heavy libraries, and give your operating system the breathing room it needs to perform at its best.